Scarecrow Pudding Cups
Scarecrow Pudding Cups are a fun and creative sweet treat for any fall or harvest party. You can make them up in advance, or they make a great fun party activity with kids, and they get a tasty snack when they’re finished!
Scarecrow Pudding Cups
When I’m making my Easy Scarecrow Pudding Cups, I like to use the Butterscotch Pudding, it’s the perfect fun fall color. However, feel free to use any flavor of pudding cup for variety or picky eaters who would prefer vanilla or chocolate.
They also make a great kids lunch box treat, I don’t know any kid who wouldn’t love to find once of these in their lunch box.
Scarecrow Pudding cups can be prepared beforehand and passed out as snacks. However, if you are having a fall or thanksgiving party with lots of kids, I recommend using this as a craft activity and allow the kids decorate their own.
If crafting with a group of younger kids, its worth keeping in mind that adults need to use the glue gun, or let the kids use Elmer’s glue (white PVA glue).
What you need to make Scarecrow Pudding Cups
Materials
- Butterscotch Pudding Cups – you could also use chocolate or vanilla.
- Orange Felt Sheet
- Natural Raffia
- Burlap
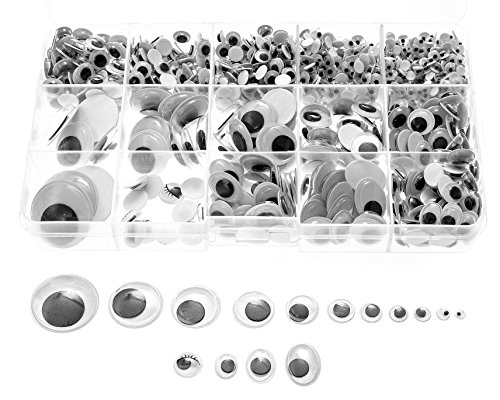
- Wiggle Eyes
- Black Sharpie Marker
Tools
How to make Scarecrow Pudding Cups
- First, gather all your supplies and materials.
- Glue two wiggle eyes on one side of butterscotch pudding.
- Cut a small triangle out of the felt sheet for the nose.
- Place the felt triangle (with a pointed side up) center and underneath the eyes.
- Use the black sharpie to draw on a scarecrow mouth.
- Next, take a few pieces of raffia and knot them together in the middle.
- Should be approximately 5 inches in length after knotting.
- Pieces can be trimmed at slightly varying lengths.
- Place a good amount of hot glue on the back off the raffia knot and place it on the edge of the pudding cup lid (above the face), pressing firmly so it dries in place.
- Next, take a piece of burlap (approximately 8” x 3”) and wrap it around the pudding cup lid, with the bottom edge giving a slight overhang to the lid.
- Use a large dab of hot glue to secure the back end pieces in place on the top of the lid near the back.
- Next place a dab of glue over the raffia ribbon knot and press the burlap down so it stays in place in the front as well.
- Finally set the scarecrows aside for a few minutes to allow the glue to set.
Variations
- I’ve used a butterscotch flavored pudding cup, as it is the perfect color for a scarecrow. However, don’t limit yourself, you can use any color or flavor of pudding in this recipe.
- I’ve used some orange felt for the nose, but red, yellow or brown felt will work equally well.
- If you don’t have colored felt, some colored card is a great swap.
- If you can’t find wiggle eyes, make your own with some black and white colored felt or card.
Hints & tips
- If making these pudding cups for school, or a kids party, I recommend using a gluten free pudding pot. Most pudding cups are gluten free but it is always worth checking as it helps to anticipate dietary restrictions.
- PLEASE TAKE CARE when using glue guns around children and avoid burning, as both the glue and the gun become really hot!
Don’t miss these additional fun Halloween Themed Creations here at When Is Dinner:
Scarecrow Pudding Cups

Materials
- Butterscotch Pudding Cups
- Orange Felt Sheet
- Natural Raffia
- Burlap
- Wiggle Eyes
- Black Sharpie Marker
Tools
- Scissors
- Hot Glue Gun
Instructions
- Glue two wiggle eyes on one side of butterscotch pudding.
- Cut a small triangle out of the felt sheet for the nose.
- Place the felt triangle (with a pointed side up) center and underneath the eyes.
- Use the black sharpie to draw on a scarecrow mouth.
- Next, take a few pieces of raffia and knot them together in the middle.
- Should be approximately 5 inches in length after knotting.
- Pieces can be trimmed at slightly varying lengths.
- Place a good amount of hot glue on the back off the raffia knot and place it on the edge of the pudding cup lid (above the face), pressing firmly so it dries in place.
- Next, take a piece of burlap (approximately 8” x 3”) and wrap it around the pudding cup lid, with the bottom edge giving a slight overhang to the lid.
- Use a large dab of hot glue to secure the back end pieces in place on the top of the lid near the back.
- Next place a dab of glue over the raffia ribbon knot and press the burlap down so it stays in place in the front as well.
These are a few items I find helpful when crafting these Scarecrow Pudding Cups:
Snack Pack Butterscotch Pudding Cups, 4 Count, 12 PackDarice Bulk Buy DIY Stiff Felt Sheet Orange 12 x 18 inches (5-Pack) FLT-0336KINGLAKE Natural Raffia for Florist Bouquets Decoration Crafts Ribbon,Total 2 x 50g,Pack of 2LA Linen 60-Inch Wide Natural Burlap , 10 Yard RollVariety Value Pack SANC 1 box/lot (approx.1120 pcs) 0.16 inches (4mm) to 1 inch (25mm) round Plastic self-adhesive black googly wiggle eyes Wide Variety Assorted SizesSharpie 15661PP King Size Permanent Marker, Chisel Tip, Black, 4-CountTitanium Softgrip Scissors Set for Sewing, Arts, Crafts, Office – Jubilee Yarn – 1 Set of 3 – PurpleGorilla 8401515 Hot Glue Gun and Sticks, 75 ct


These look so cute and fun! I’m going to try this with my little brother!